
Rooting, bootloaders, custom ROMs, CyanogenMod, ClockworkMod... it's all pretty confusing, isn't it? You're not the only one having trouble with this. Many users in the Nexus 7 SoftModder forum have been scratching their heads at these many terms.
First, let's cover the terms, so we can get that out of the way.
The Most Frequently Used Terms You NEED to Know
- bootloader: A bootloader is what tells your Nexus 7 what things to load when you first turn it on. Think of it as a set of instructions for what switches to be switched on and in what order.
- Unlocking bootloader: Unlocking a bootloader is allowing your Nexus 7 to load or switch on whatever it wants when it boots up. Bootloaders come locked out of the box to prevent unwanted tinkering; unlocking it will allow for custom ROMs on your Nexus 7.
- Rooting: Rooting is gaining access to parts of Android you normally not allowed in. Think of it as kicking down doors at the office that say "Restricted: VIPs Only". Once rooted, your Nexus 7 can run cool and innovative apps that require all doors to be opened to work.
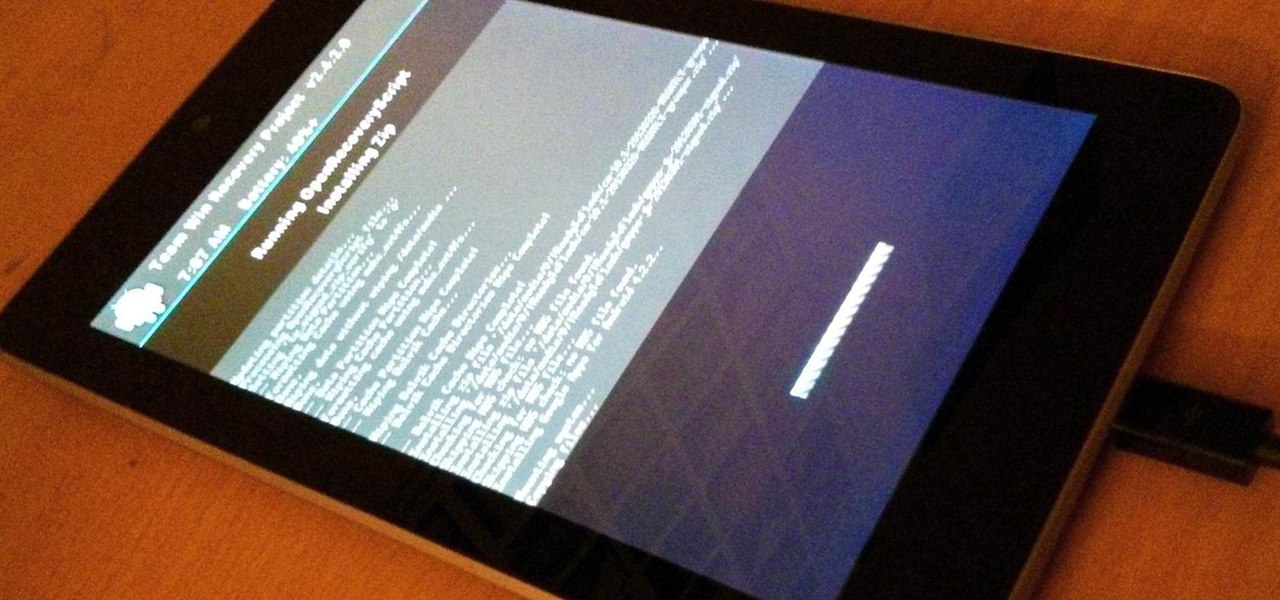
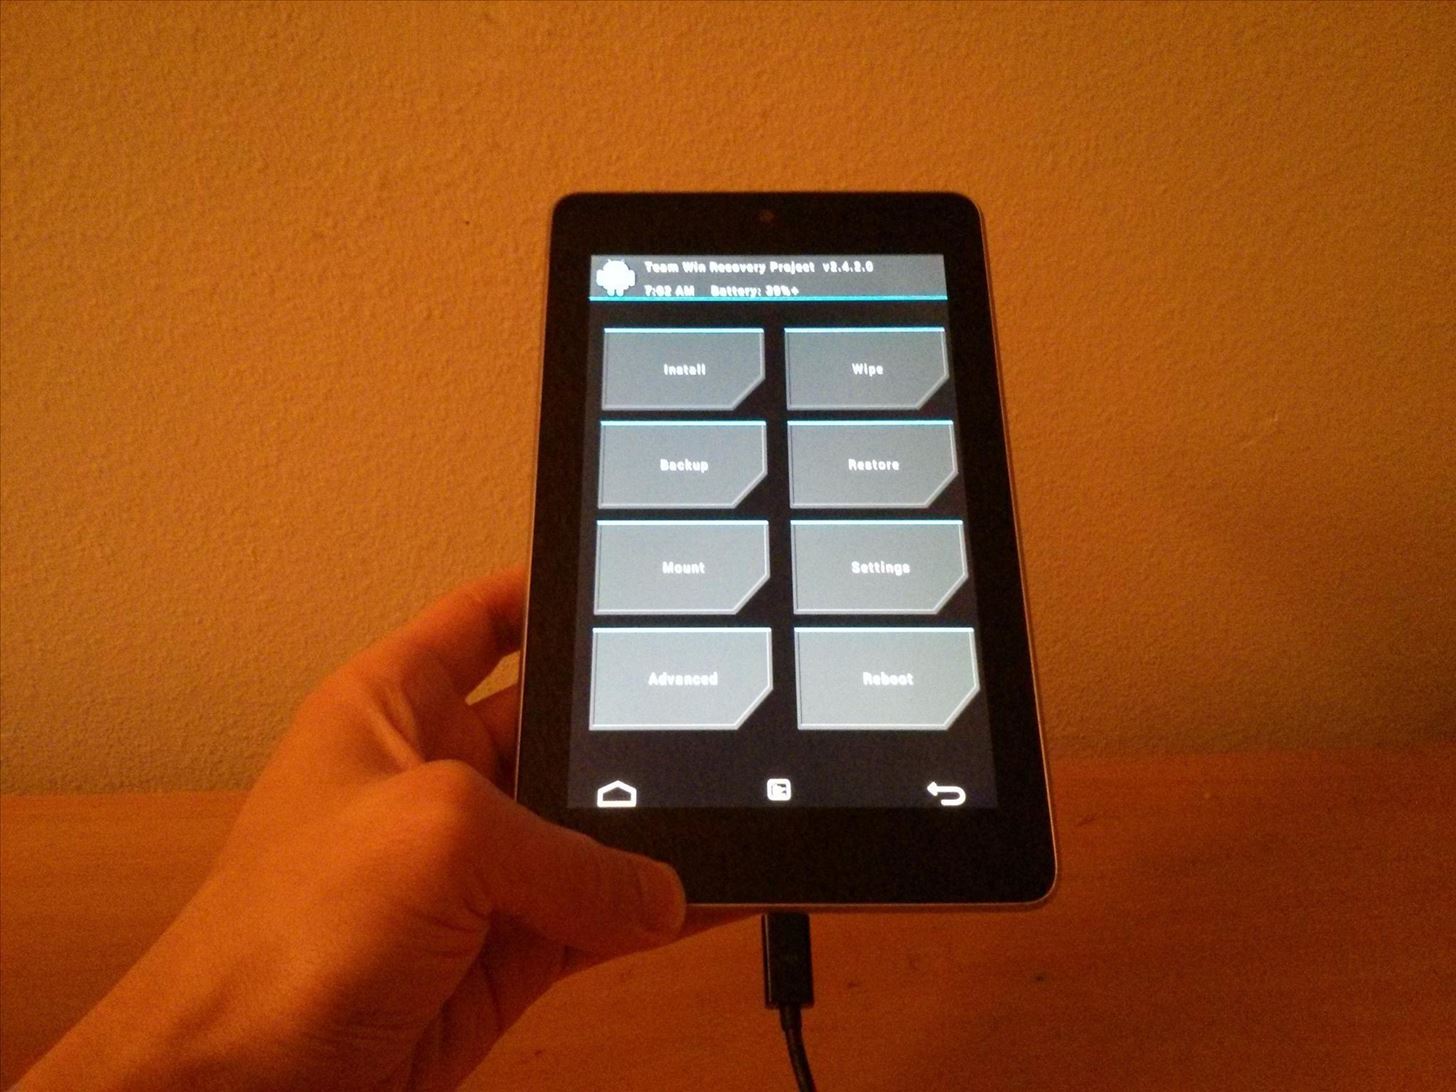
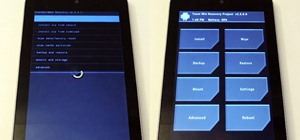
- Custom recovery: Used to install custom ROMs on your Nexus 7. It's also used as an option to restore your device to stock when things go awry. It's the most used tool in custom ROMs. Popular custom recoveries are ClockworkMod (CWM) and Team Win Recovery Project (TWRP) which uses a touch-only interface to install ROMs, making it a super easy process.
- Flashing: Flashing is simply the process of installing a custom ROM (or even a stock ROM) onto your device.
Whew! Okay, now you know that basic terms. Great!
Breaking Free of Your Stock Android System
So, now how can you finally break free from your stock Android OS on your Nexus 7 and explore the ultimate customization options available?
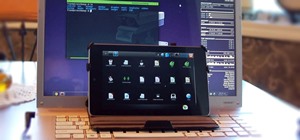
The rest of this article will cover how to get the most out of your Nexus 7 tablet and guide you through the process of prepping your Nexus 7 for custom ROMs using a Windows computer. Adding a custom ROM onto your Nexus 7 will increased speed, give you better performance, and more. So, let's begin!
Step 1: Enable USB Debugging
Begin by enabling "USB debugging" on your Nexus 7. This is the most important step because the toolkit will automate everything for you. Enable "USB debugging" by going to Settings -> Developer Options -> USB Debugging.
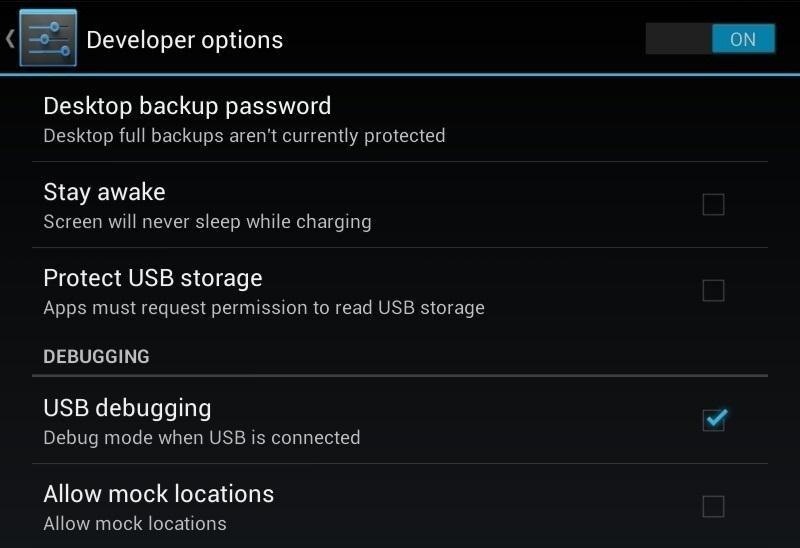
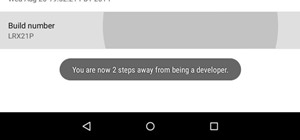
Note: If there is no "Developer Options" shown in "Settings" menu, you can unhide it by going to Settings -> About Tablet -> Build Number and tapping on that 7 times to unlock it. This is something Google started implementing in Jelly Bean 4.2 and higher.
Once enabled, plug your Nexus 7 into your computer using the USB cable that came with your tablet. Don't remove the USB cable from your Nexus 7 unless the toolkit tells you to do so later.
Step 2: Toolkit Time!
On your PC, begin by downloading the Nexus 7 Root Toolkit. Install the toolkit by clicking "Next" through the various prompts.
Once the installation is complete, go ahead and run the toolkit. A window will pop up asking for your device model. Choose your device from the list along with its OS version and click "Apply".

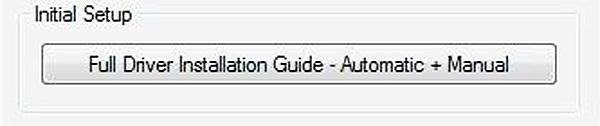
Head over to "Initial Setup" and click "Full Driver Installation..."
Follow the guide provided in the toolkit to install the required drivers for your Nexus 7. I recommend "Driver Solution #3", but any of the three options should work. The toolkit has a built-in guide with pictures that will aid you in installing the drivers.

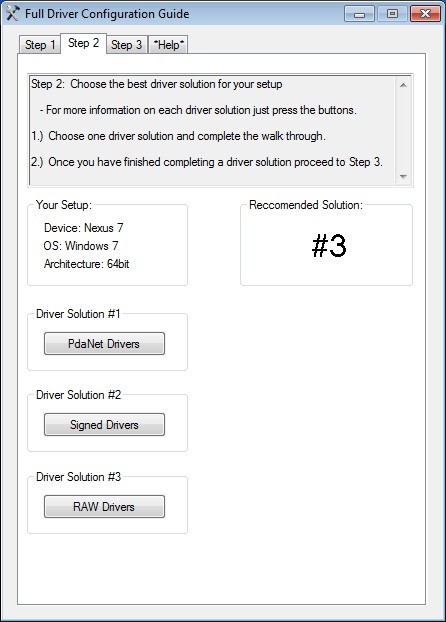
Now with the drivers installed, make sure they're working by testing them over in the "Step 3" tab. The toolkit will verify if the drivers are properly installed and working.
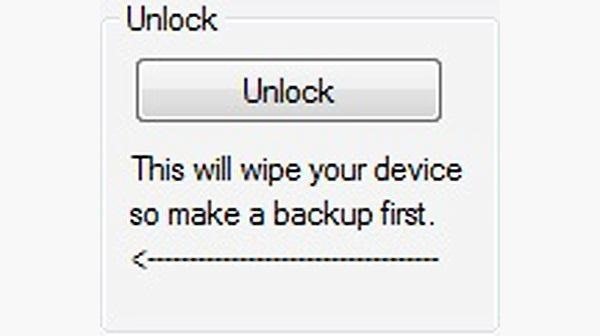
Step 3: Unlocking the Bootloader
Click on "Unlock" to unlock the bootloader. Everything will be automated, so just follow its lead. THIS DELETES EVERYTHING ON YOUR NEXUS 7—back up everything important.
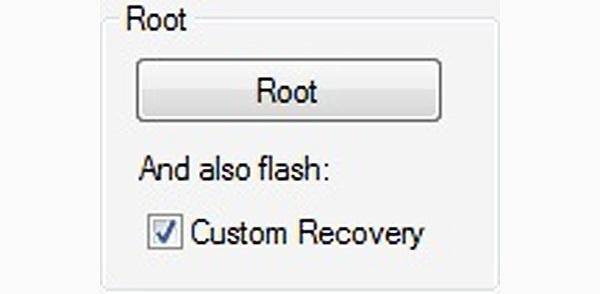
Step 4: Rooting and Custom Recovery
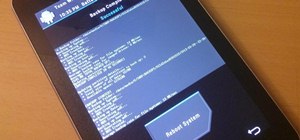
With the bootloader unlocked, head over to "Root" to root your tablet. Check the option for "Custom Recovery" to have TWRP installed. Then click "Root" to begin the process.
Step 5: Custom ROMs
Using a web browser on your PC, download the custom ROM you want to use. As an example, I will be installing the CyanogenMod ROM, but the process is the same for any custom ROM of your choosing. The latest version of CyanogenMod for the Nexus 7 can be downloaded from this page.
CyanogenMod also requires Google Apps (GApps), so grab the latest version here.
Now, let's head back over to the toolkit. With the toolkit opened up on your PC, click the button for "Launch" in Advanced Utilities.

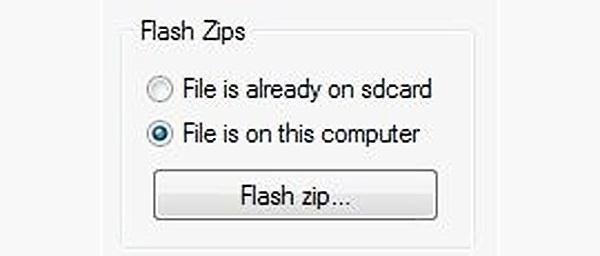
A very large list will pop up, but what you want to focus on is the section called "Flash Zips". Choose the option for "File is on this computer" and press "Flash zip...".
A new window will open for flashing ROMs. Add the two zips files you downloaded earlier by clicking "Add zip's to flash...".
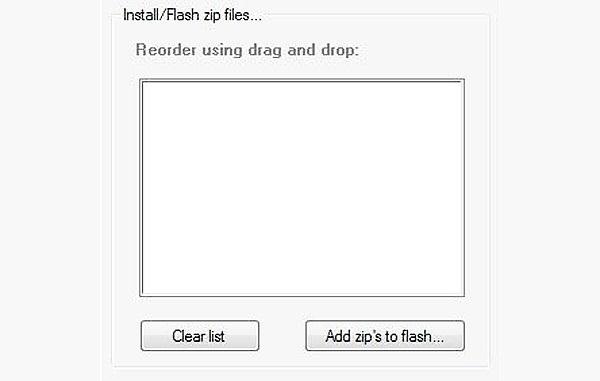
CyanogenMod should be selected first, followed by GApps, so they flash in that order. With the files added, go over to "Wipe selected partitions..." and check the boxes for "Enable" including the boxes for "Data", "Cache" and "Dalvik".
This ensures your old OS will be deleted before installing the new custom ROM.

Click "Confirm operation" to begin flashing. Just sit back and let the toolkit automate the flashing process for you.
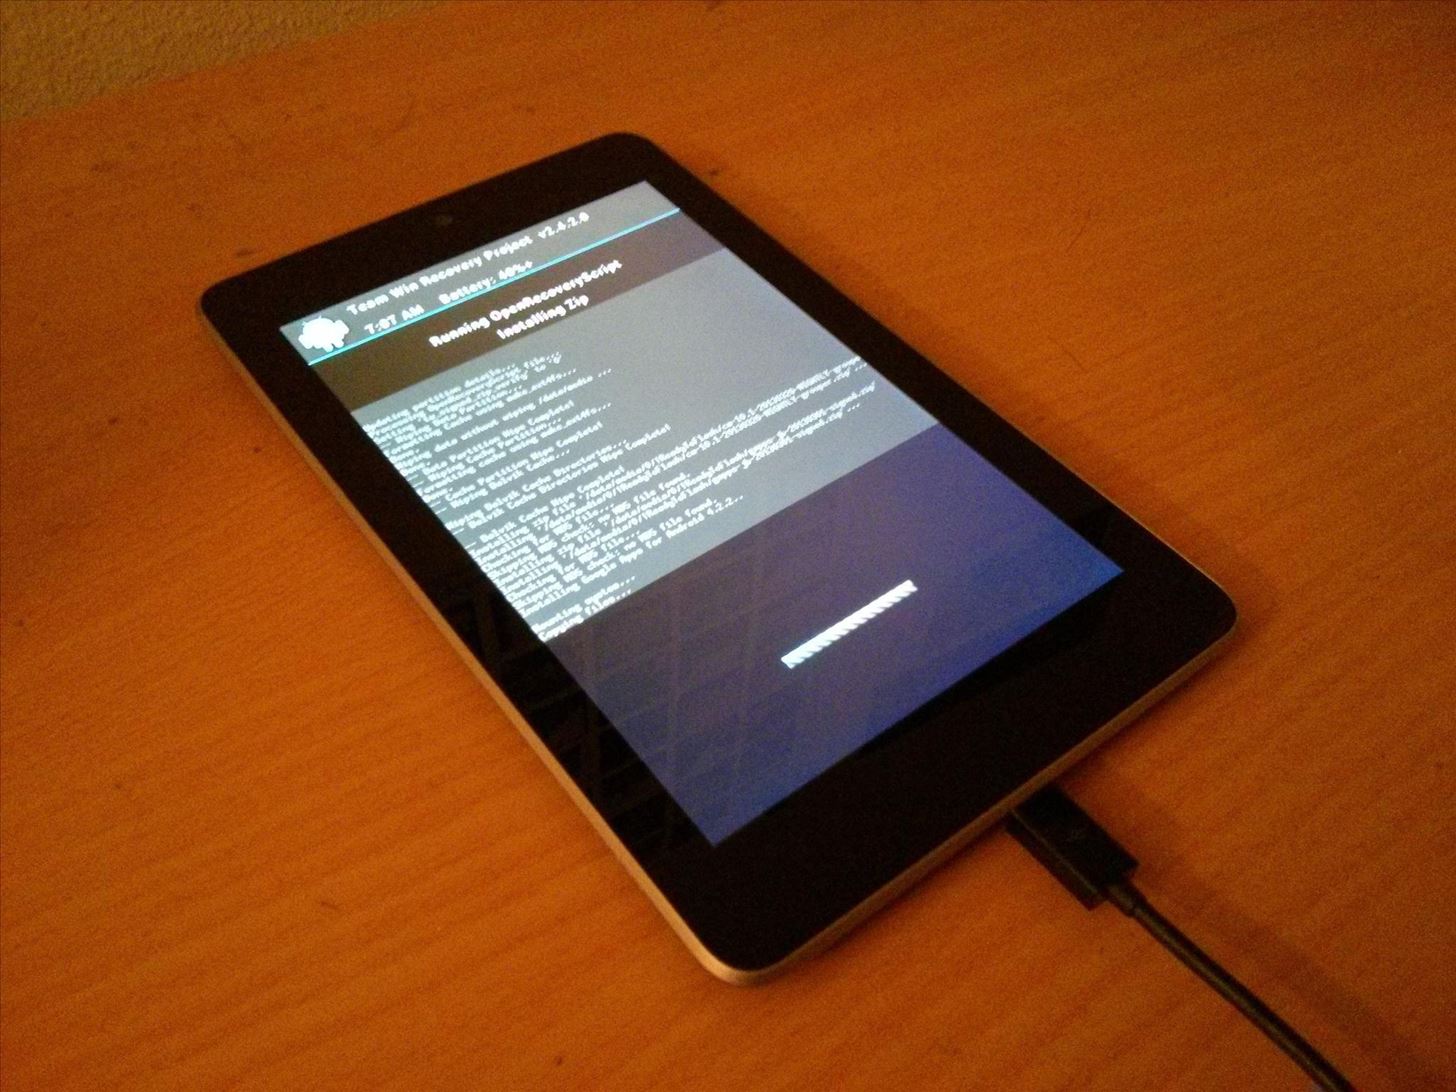
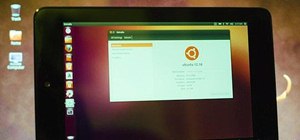
Once complete, your Nexus 7 will boot up into the new custom ROM that was installed! You can now unplug the USB cable if you want.
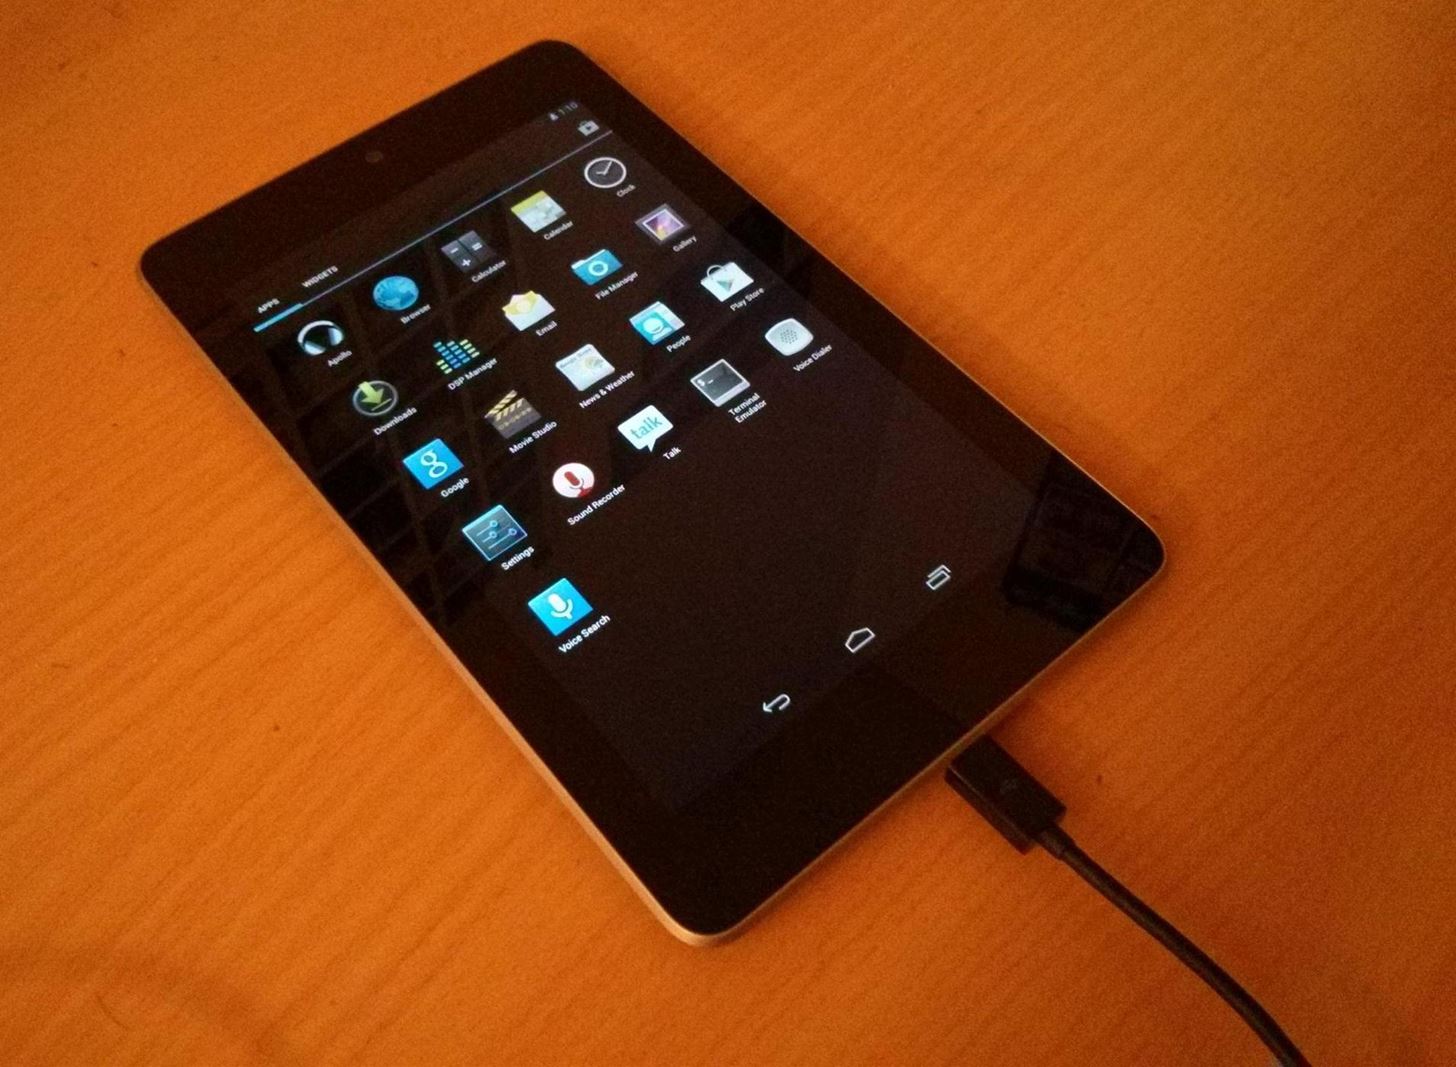
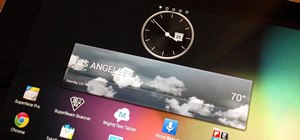
Here is CyanogenMod booted up for the very first time.
Now, tell us if it worked for you!
Just updated your iPhone? You'll find new emoji, enhanced security, podcast transcripts, Apple Cash virtual numbers, and other useful features. There are even new additions hidden within Safari. Find out what's new and changed on your iPhone with the iOS 17.4 update.


60 Comments
Have been waiting for an easy to follow guide on this topic for a while, so thanks for posting. However, I can't seem to get past the first task of installing the drivers. I've followed the instructions to the letter and everything seems to go as described except the final step when I'm asked to do a full driver test. I get a small box appear saying 'Checking ADB Status' and that's it. Nothing else happens.The box just stays there forever. Am I missing something?
Hey Steve, sorry to hear you've ran into a hiccup. If it's stuck at "Checking ADB Staus" it just means the Nexus 7 isn't recognized by the toolkit. Here's what you should do:
Unplugging and plugging in the USB cable also helps to get it to recognize with the toolkit
Tell me how it goes.
This is a poorly writing tutorial and I am a complete idiot for fallowing now my nexus is booting in to the home screen and nothing else no applications no option nothing only settings not even boot back with the developer option active in fact the end after the flashing is missing the explanation of what to do next the nex7 stay on TWRP screen and one assume just to reboot but then is went in come to this single screen Thanks God I did my nandroid backup
I recommend to check some were else and get a much better completed tutorial.
What a waste of time
Hey Oscar,
Not sure what you mean by "booting in to the home screen and nothing else no applications", if you followed the how-to and flashed CyanogenMod, make sure you flashed Gapps also. That might explain the lack of apps on your tablet.
Going to a custom rom does wipe your tablet and all of it apps.
If you got into TWRP, you can manually flash the custom rom by:
I did the manuel wipe but now im going to manually install the zips but where are they in the tablet folders? they arent there. or maybe im not seeing them.
Update the stupid nandroid backup is not working so for now I have a nice 7 inch clock
Thank you Danny Lou
Oscar,
The how-to never mentioned doing a nandroid backup. Your best option is to reflash the custom rom manually with the steps I posted above. It should be back to working order after.
I liked your article, but the risk of a non technical person trying to unlock and root is too great as to bricking my Nexus 7 and invalidating my warranty.
For an novice, why not first use the app backup and restore.apk free from Google Play and save the app folder to your computer.
If you crash or run into a problem somewhere down the road, just go to your settings and restore your Nexus 7 to the factory settings and then you can install the app back and restore.apk again from Google. Then I can restore the saved app backup folder from my computer back in my Nexus 7 internal storage and restore from there.
There are some of us out there not that knowledgeable to do what you suggested as I read above from people who bricked their devices and my way may be a more simpler and less risky , but it still will do the same.
There are always risks to soft-modding. Doing any soft-modding will never lead to a permanent brick. It's ALWAYS recoverable to stock. Check out these guides for backing up and restoring.
Definitive Guide to Backing Up Your Nexus 7
Definitive Guide to Restoring Your Nexus 7
Danny!
I think some of the difficulties deecribed here are matter of attitude rather than actual error on your part. Witness the liberal use of profanity combined with incorrect English.
There is something that is under-emphesized in your writing, and that is the very nature of Android.
What makes Android so wonderfully customizable is the source of many difficulties in customizing such a system.
Android is nothing more, nothing less than an embedded Unix system. The Unix variant is called Linux, but an embedded Unix it is.
As such, it is a modular system composed of a kernel running in a very protected/encapsulated kernel surrounded by hordes of simple tools. What makes Android unique is that most of these tools are also running in a protected/encapsulated environment.
Ideally, such an elaborate system should be installed as a monolithic block so that novices are separated from these details.
However, the paranoid licensing of Android forces exposure of some such details.
There are only two options opened to the novice:
A. Learn/Abandon; either learn enough to understand what you are trying to accomplish or abandon attempts at customizing and restrict yourself to installing application-packages.
B. Blindly and meticulously follow guides such as presented here. In this case you must assume that any error is yours. It is very easiy to introduce an error, one you swear you did not make.
One thing to avoid is swearing in public. The device does not care about your childish immaturity and the author or the guide is less inclined to help abusive correspondents.
This is all I have to say on this subject.
Well said.
Hi there,
I have previously rooted my nexus 7 using an older version of this toolkit however when the android update came through it unrooted the device. I am now trying to root it again with android 4.2.2 running and NRTK v1.6.3. I have encountered a problem when trying to unlock in that it just reboots the device in bootloader then boots it normally again without wiping it. Any advice would be brilliant, Thanks. (previously when rooting i did not realise it had not unlocked properly so proceeded to root it which completely crashed my device so i had to factory reset using stock imaes)
Also all drivers are working to my knowledge, a driver test came back with success.
If it was unlocked before, the Nexus 7 should still be unlocked. You don't have to do that part twice.
i rooted with my nexus 7 without the custom recovery is there anyway i can get it now that i am rooted?
Assuming you have your bootloader unlocked as well, just download ROM Manager and it will install the custom recovery for you.
I tried followed the guide and now all I get is CyanogenMod Screen with a spinning wheel and it stays there. I cant restore because it says the device is not detected. The only thing I can think I did wrong is I installd the Rom image first and the googleapp second. What did I do? Plese help.
Just reflash the rom.
I followed everything in this article and it worked (pretty much). I can't get a working wifi connection. It shows a grey signal but it won't turn blue. Unless there is a solution, I'm going to have to revert to stock Android; I need a working wifi connection! Please help!
I figured it out; I had a proxy on and it wouldn't let me connect to wifi. I fixed it, thanks!!!
OK so I think I'm special for even asking this, but I noticed the guide said PC, what if I have a Mac, will it still work?
This is PC only, but luckily there's a tutorial for Mac users right over here!
Hmm, firstly, thanks for you guide however I am now stuck on the CyanogenMod screen with the loading circle spinning and nothing more, I've tried rebooting but it's still the same, any ideas?
This is a great tutorial. There is only one thing that I want to add to the thread and that it is EXTREMELY important to use the right cable when connecting your device to your computer and getting it properly recognized by Windows. Please learn from my mistake as I found this out the hard way - if you are having trouble getting your device to be recognized then try a different cable! The cable I initially used allowed my device to "somewhat" be detected - albeit incorrectly detected - and even allowed my device (Nexus 7 wifi only) to receive a charge. After going through numerous attempts and changing the device to different USB ports (as recommended) I still couldn't get my device to be properly recognized. I tried all four variations of the driver sets and still couldn't get my device to be recognized by Windows. Finally, I decided to try a different cable. I was certain that my cable was not going to be the problem but I was ready to try anything at this point. And immediately everything worked as soon as I changed the cable and everything was a breeze from that point forward.
I get the exact same error, what do you exactly mean with the cable? Did you just buy another one? Thanks (I'm using the one that comes with the tablet)
He means just making sure the tablet is verified to be properly detected to your computer. That is crucial for this to work. The pre-supplied cable is what I used for my guides.
How do we do this on a mac?
Is it possible to flash the latest Paranoid Android ROM just by using the toolkit?
So I've just tried following yours and other guides which use the NRT (same version 1.6.6 for the Nexus 7 Wifi) and on all the guides I seem to get stuck on the same point which is the driver installation. I don't know why but none of the driver options seems to work. It checks for an ADB and a large window pops up saying it didn't recognise it, which is seriously strange as in the device manager I can clearly see: Android Device -> Google Nexus 7 ADB Interface. I tried everything and followed the guide / driver installation guide step by step, I even tried the "switching USB ports" but nothing worked, any idea why might that be? Other than that it seems like a clear helpful guide.
Thats odd, because at least one of the driver options should have worked. Is there anything else plugged in to your USB ports? I know I run into problems when I have multiple USBs plugged in.
hey man so i did everything already.... i flashed the mod and gapps to the memory and it took me to twrp and showed a few files loading (i suppose) but then it stopped so i just hit reboot and then system and it booted right back to android 4.3 not CM did i miss something?
If you're in TWRP you should be flashing the rom. Try going to advance settings in the toolkit and choose "boot temporary custom recovery" and then flashing the ROM manually. You're on the right track!
how do i get the zip files onto the tablet to manually flash them?. in twrp my computer shows nothing's there so i cant move files
Try downloading the ROM and gapps first using your tablet's browser. It will be saved to the Download folder. You will find the file in TWRP, so you can flash it.
Worked perfect on my Nexus 7c Mobile (2012) using Wugfresh's Toolkit and the newest ParanoidAndroid ROM. Thank you for posting this!
Still struggling - Tablet seems recognised OK, and I have unlocked it. It is hanging at the root/TWRP stage (both by going through the root button and the Advanced Utilities/Temp Boot options). Its hanging at "Booting modified boot.img to enable running privileged commands" when I go the Root button way, and I cant get any further. Help on This?
Hey man i am having the same problem. Did you ever solve it?
Hi,
Is it possible to lot my nexus 7 without wiping all the data and APS I have on it?
I have been using the nexus since the original first came out and have a lot of stuff on it that I do not want to loose or have to download again.
Is there an easy way to backup the APS and data and then reload them after I have rooted it?
I have a Nexus 7 2013 tablet, now running Android 4.4. Will this work with that configuration?
Interesting, I get into TWRP but then the automatic process as facilitated by the toolkit stops. So, I manually selected install, browsed to "flash zips" and selected both zip files. The install did start but I then got an MD5 hash error (MD5 not found). Should I have selected, found, generated, whatever a separate MD5 hash file? Any suggestions?
Thanks and nice website by the way.
Cheers,
Wil
Well done, Danny. Great guide.
I ran into a hiccup when I tried to flash CyanogenMod and Google Apps. Not sure what happened but I just proceeded by using the CyanogenMod Installer and that worked fine.
Do I need to install a custom rom? If I install CyanogenMod do I still have all the features that are in android 4.3? Can I do this on Kitkat? Sorry I'm going to get my first android very soon.
Worked like a charm. However, it did take several attempts to get it right. It pays to read the fine print.
i have a nexus 7 tablet android version 4.4.2. i unlocked the tablet and then pressed the root button it connected and then got to this point. Booting modified boot.img to enable running privileged commands
it just stayed there. it didnt mess up my tablet. how do i get pass that to root it?
Hey man i'm having the same problem, did you ever solve it?
When Cyanogenmod boots up I get notifications saying: "Unfortunately, Network Location has stopped."
And "Unfortunately, Android Keyboard (AOSP) has stopped)."
I have no idea what I need to do if I can't use the keyboard. I hope someone can help.
Hey,I aIso have the same problem. Tried reflashing the ROM but the problem remained. Even the back button is also not working . Maybe Danny can suggest something..
um, there seems to be a problem with Cyanogenmod, i have the gapps but they don't install. It even says on their page that gapps aren't ment to work on cyanogenmod operating system. And all of this new setup just because of the 4.4.2 update. Please help me!!
TWRP is a better option i guess then.
Very well written and easy to follow. Actual time for end to end completion was a couple hours do to issues resulting from Win7 via Parallels on top of OSX Mavericks. Connectivity, drivers and such are not always as seamless as expected when using virtualization.
Well done and thank you!
My question is : If when I unlocked and rooted I also chose the 'flash recovery' , do I still need to flash from the toolkit ? Can't I simply flash from TWRP , that's already installed on my N7 ?
BTW : Thank you for the tutorial. Works great !
Nope. Once you're unlocked and have a custom recovery (TWRP), you can flash mods and ROMs directly from the recovery.
I am also wondering if after unlocking and rooting I will still be able to receive official Android updates, because, my Acer, after rooting doesn't receive updates.
Danny, How long should it take for the boot.img to upload? It's been uploading for over 15 minutes.
Please advise, after step no 4, what should I do? because I found in my tablet with frozen screen with word "START" and in PC show up notification "Booting modified boot.img to enable running privilliged commands".
Do I need to shutdown my tablet and press it on again? Please help..thank you
i have select the "and flash custom recovery" and rooted my device (nexus 7 2012)
then which mode get installed in my device(CWM or TWRP)
pls tell........................................
and can u easily explain me from.......
if u have a video of yours then pls send me its link in reply
thnx in advance
Went through all the above procedure. Thought everything was working properly and Cyanogen started to load. I get to the prompt asking for Wifi login and I get the message "unfortunately Android keyboard stopped working", so I can't enter the password or anything!
Any ideas?
i have fergot the pattern lock. unable to root aslo as usb debuging is not ticked.. please help...my device in nexus 7 2013 wifi
Dear Danny - Many thanks for this GREAT set of instructions. I am a very unsavvy computer illiterate older generation guy. I followed your procedure step-by-step and it worked perfectly the first time. Now running CM 11. What an improvement over Lollipop! Congrats & Thanks. -- Bill
hello was looking for the dropdown for 6.0.1 and cant find it, any advice?
I keep getting this error when trying to unlock bootloader - Retrying Attempt #1 of 5: fastboot getvar unlocked.
I am on latest official N7 software
Share Your Thoughts