
If you're as bad at locking your Nexus up as I am, you have the "slide" option set for your screen lock. It may not be the most secure option, but it's definitely the easiest way to unlock your device while being able to utilize lock screen widgets.
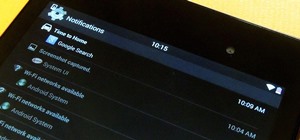
Now look at your lock screen. See that bubble with the padlock in it? That's your lockring, and I bet you never really paid attention to it before. That's because you've swiped it so many times you forgot it was even a thing.
Well, in today's softModder guide, I'm going to show you how to never forget that lockring again by customizing it with something more unique and individualized.
While the process may involve a few more steps than installing an Xposed mod, it's still relatively simple. Just make sure that your Nexus 7 is rooted and has a custom recovery installed before going any further.
Step 1: Install ZipThemer
In order to customize the lockring on the Nexus 7, you'll first need to download and install ZipThemer (free on Google Play), which enables you to build your flashable .zips. More on flashable .zips later.
Step 2: Download Edify (For Stock ROMs Only)
You will also need the KitKat Stock Edify .zip file, but only if you are running the stock OS. If you're on a custom ROM, you can skip the Edify file (but you'll still need ZipThemer above).
Step 3: Select Your Custom Lockring
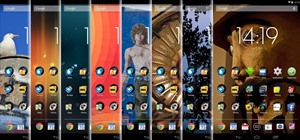
Next, you'll need your custom lockring. Since making your own is relatively hard, I suggest using one of the pre-made ones already available.
Check out the this thread by XDA member mathewo776 to see all of the available options. Or, you can simply select from a few of my favorite lockring designs below.
Download the .zip file for the lockring of your choice, then move on to the next step. Remember the name of your theme, as it will make it easier to locate it later in the process.
Step 4: Set Up ZipThemer
Open the ZipThemer app you installed in Step 1 and tap the three-dot menu option up top, then select Update Edify.
Tap Browse and locate the KitKat Stock Edify .zip file you downloaded in Step 2, which should be under your Downloads folder, unless you moved it.
If you're running a custom ROM, select the .zip file for the ROM itself.
Once selected, go back and hit Configure and you should get a toast notification saying Success!.
Step 5: Build Your Flashable Zip (& Backup)
Now that you're configured, go back a screen and select the Output File.
Tap +Theme and browse for the custom lockring .zip that you downloaded in Step 3. Again, unless you moved it, it should be in your Download folder.
After selecting the .zip file, go back and tap Build It!. The application will ask if you want to create an Undo file as well—select Always. This will insure that you have a backup of your original lockring which can also be flashed in recovery if you want to revert back.
Step 6: Enter into Bootloader Mode
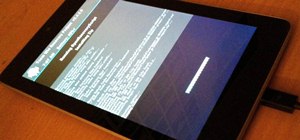
Now that your .zip is ready and flashable, enter into recovery, either manually or using an app like Reboot Menu Widget or Quick Boot. You can enter your recovery manually by powering down your device, then holding down the Volume down and Power keys at the same time.
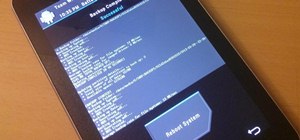
Step 7: Flash Those Zips in Recovery
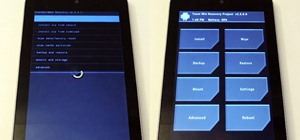
You're now in the bootloader, so navigate to Recovery using the Volume rockers and select using the Power button.
I have CWM recovery, so my path was install zip -> choose zip from SD card -> 0/ -> DarthVader-update.zip. Obviously, yours may not be called Darth Vader, but you get the point. Flash the .zip, then reboot.
If you're using TWRP, the process is essentially the same, only instead of using the Power and Volume keys, you've got a handy touch interface.
Enjoy Your New Custom Lockring
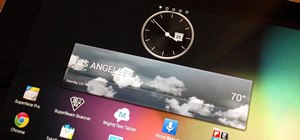
When your device reboots, you'll see your new unique lock ring rubble that you can swipe to unlock. The extra benefit of this new custom lockring is that it'll even work if you have multiple user accounts.
However, this will not work with a restricted second user account, as you're forced to set up security.
For more lock screen fun, try unlocking your device by playing games, accessing notifications and quick settings (from a secured device), getting adaptive app shortcuts, or setting a different wallpaper than the home screen.
Just updated your iPhone? You'll find new emoji, enhanced security, podcast transcripts, Apple Cash virtual numbers, and other useful features. There are even new additions hidden within Safari. Find out what's new and changed on your iPhone with the iOS 17.4 update.


9 Comments
i tried ur guide with twrp but after flashing zip it shows success but lockring does not change. i followed each step properly.
and how to install cwm i rooted my nexus 7 with the guide provided on this site..plz reply..
do i need to press mount system after it shows success for flashing the system or press reboot system...????
do i need to press mount system after it shows success for flashing the zip or reboot system??
It should be a simple reboot.
First off I want to say thanks for all the help this site has given me. I truly didn't know so much could be done with my N7 when I first got it. Its like a completely different maching now.
Im having trouble getting the lockring mod to work. I have read the article and watched you tube several times. I have a N7 running cyanogenmod 11, and I have installed zip themer. I found the lockring I wanted and got it downloaded. I went to zipthemer, configured it and got the success toast message, booted into recovery (cwm) installed the zip file and then rebooted the system. After it reboots I still just have the padlock lockring. What am I not doing?? This is a really cool mod that I want to do so if anyone can point me in the right direction I would surely appreciate it. Thank you for any help and time spent in advance
did you set up zip themer using your ROM zip? Stock users need to use the KitKatStockEdify.zip
Also, are you running KitKat?
I thought I did??. I have the Motley kernel installed and I used that and got the success toast, that is the only thing I could use and get the success message, everything else said updater script not found... Cyanogen mod is my ROM right. I thought that CM11 is what I'm running in place of kitkat. Is that not correct?? I'm as confused as a baby raccoon
No, you're correct. Unfortunately, I didn't do this on a custom ROM. I'll look into this more and have to get back to you. It may just work only on stock ROMs.
That would be great. I follow all your tutorials and I am continually amazed at what this device can do. You do great videos and have helped me tremendously. Thank you for all your help.
Share Your Thoughts