

Google has already started to roll out the over-the-air update of Android 5.0 Lollipop to older Nexus series phones and tablets, but chances are it will take a long time for the OTA to hit your device.
If you don't want to wait, you can manually install Lollipop right now if you have a Nexus 7, Nexus 10, Nexus 4, or Nexus 5.
The process is fairly simple if you have a Windows PC, utilizing WugFresh's Nexus Toolkit to do all the heavy lifting. It's not much more difficult for Mac users, since it's only a few ADB commands that need to be run.
Warning: Back Up Your Nexus Device
No matter which method you use, be aware that this process will require that you unlock your Nexus's bootloader, which in turn will completely wipe your device. While items like apps and contacts will restore themselves, you'll want to make sure that you've backed up any media (unless you store in the cloud), text messages, and contacts.
Download Lollipop onto Your Computer
Download the official Android 5.0 Lollipop factory image linked below for your specific Nexus device. As of right now, all are available now except the Nexus 4 version.
Windows Method #1: Flash Lollipop with the Nexus Root Toolkit
This method is easy, and just for Windows users. Once you've downloaded the factory image above, all you need to do is install the Nexus Root Toolkit on your PC and simply follow along from Step #1 in Dallas' guide on installing the preview build on a Nexus device. Everything will be exactly the same, just skip Step #3 since you've already downloaded the latest image.
Mac Method & Windows Method #2: Use ADB & Fastboot
If you don't want to use the extremely easy Nexus Root Toolkit method above on your Windows PC, alternatively, you can do the process manually by following the steps below, which is also the same exact process for Mac OS X users.
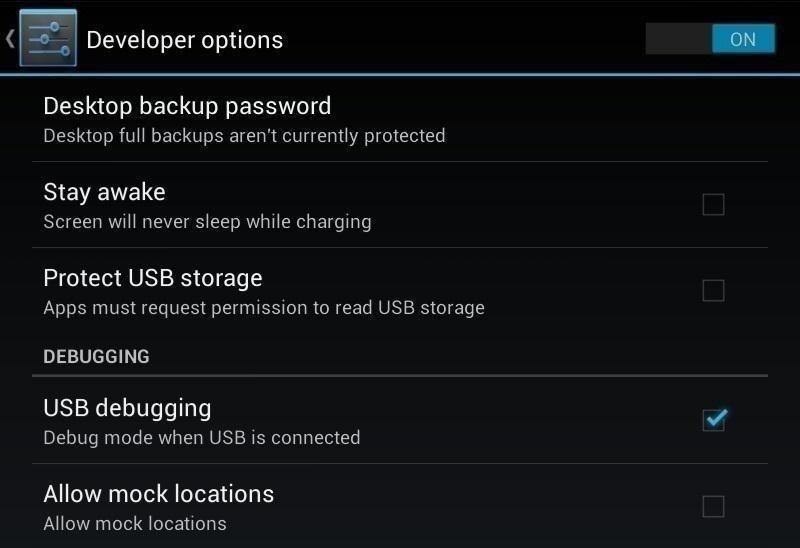
Step 1: Enable USB Debugging on Your Nexus
Aside from already having the Lollipop factory image downloaded onto your computer, you'll need to have a good USB cable and "Developer options" enabled, as well as the "USB debugging" option checked within that Settings menu.
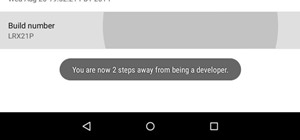
If you don't see "Developer options," go to your "About device" menu and tap on the "Build number" repeatedly until you unlock the option.
Step 2: Install ADB & Fastboot
This process will utilize fastboot commands via ADB to flash the factory image. Mac users can install ADB and fastboot using the method outlined here, while Windows users can follow the method outlined here.
Step 3: Move Lollipop Files to Platform Tools Folder
Once you're set up with ADB and fastboot, it's time to run some commands, but before doing so, move the factory image file that you downloaded above over to the same folder as the "Platform Tools" where ADB and fastboot reside, then extract it.
Step 4: Unlock Your Nexus's Bootloader
Power your device down, then enter bootloader mode by holding the Power and Volume Down buttons at the same time, then plug your device into your Mac or Windows PC. Now open up a command or terminal window, and type in the following commands one by one.
- ./adb reboot bootloader
- ./fastboot oem unlock
You'll now see an option on your Nexus screen asking if you'd like to unlock your bootloader—make sure the "Yes" option is highlighted, then hit the power button to confirm.
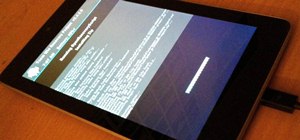
Step 5: Flash Lollipop Components Together
Now it's time to flash Lollipop! A more visual guide can be seen here, but I'll go over the commands below.
You can flash the boot image, radios, and factory image separately, but there is all-encompassing script that does all the heavy lifting for you. Use the following command in your command or terminal window.
- flash-all
This command will flash everything you need, and when you're booted back up, you'll be ready to set up your Android 5.0 device.
Step 6: Flash Individual Lollipop Components (Optional)
If you'd rather flash the above components one-by-one, here are the commands you'll need for each. If you already did this is Step #5 above, you do not need to do this—skip to Step #7 below.
- ./fastboot flash bootloader [bootloader file].img
- ./fastboot flash radio [radio file].img
- ./flashboot -w update [image file].zip
Step 7: Enjoy Lollipop on Your Nexus!
Your device will reboot, and you'll be ready to set up Lollipop when it does. And now that you're on the latest and greatest, discover all of the new goodness of Android 5.0 in our comprehensive features coverage.
Drop us a line in the comments below with your thoughts, or if you need additional support getting the image flashed.
Just updated your iPhone? You'll find new emoji, enhanced security, podcast transcripts, Apple Cash virtual numbers, and other useful features. There are even new additions hidden within Safari. Find out what's new and changed on your iPhone with the iOS 17.4 update.


4 Comments
i used the Dalla's guide to install it, when i do step 6, it never ask me for MD5 number, it automatically detects that and says its a mismatch.
using NRT 1.9.3
Try updating NRT to 1.9.4, and use that to download the factory image directly.
Or, just use the MD5 from the Nexus images page.
I tried both the methods, but I keep getting the above error! I know it tells you to ignore the 'boot.sig' error, but whats with this 'error: update package missing system.img'? I am using Nexus 5 and have rechecked that I'm using the correct hammerhead image 'lrx21o' for Android 5.0. Is anyone else getting the same error? Does anybody know how to resolve it.
http://www.ibtimes.co.uk/how-fix-error-update-package-missing-system-img-android-5-0-factory-images-nexus-devices-1474865
Share Your Thoughts